Shader Animations
Added some improved breathing/hair animations to most of the important characters in the novel.
Also added wind animations to most of the backgrounds.
Implementation Details:
The Animation consists of two shaders. The first shader simply scales the whole image up and down along the y-axis. The second shader adds a more intense scaling in the y-direction and an additional scaling in the x-direction to make the hair bounce to the sides.
Breathing:
The first shader can be added to renpy like this:
```
init python:
renpy.register_shader("game.breathing", variables="""
uniform sampler2D tex0;
uniform float u_time;
uniform float u_breath_cycle;
uniform float u_offset; // in 0 1
uniform vec2 res0;
varying vec2 v_tex_coord;
""", fragment_300="""
float scale = 0.5 + 0.5 * sin((u_offset + u_time / u_breath_cycle) * 2.0 * 3.141);
#ifndef TEXC
vec2 texC = v_tex_coord.xy;
#endif
texC.y = 1.0 - (1.0 - texC.y) * (1.0 + 0.01 * scale);
if(texC.y < 0.0 || texC.y > 1.0) discard;
gl_FragColor = texture2D(tex0, texC, -0.55);
""")
Here, the scale variable controls how much we scale the image. It uses the global u_time timer and a user supplied u_breath_cycle variable that sets the duration of a single breathing cycle. The u_offset can add an additonal offset to the animation, that should be different for every character in the scene (Otherwise everyone will breath in and out at the same time...)
This shader can be added to a character with a simple transform:
transform breathing:
anchor (0.5, 1.0)
shader "game.breathing"
u_breath_cycle 5.0 # duration in seconds for the animation
u_offset 0.0 # TODO you should randomize this for each character
pause 0 # forces a redraw every frame
repeat
Usage:
show alice at breathing
```
Hair Bounce:
For the hair bounce we need an additional texture that specifies where the bounce will be more intense.
For Alice, the original texture and the additional texture look like this:
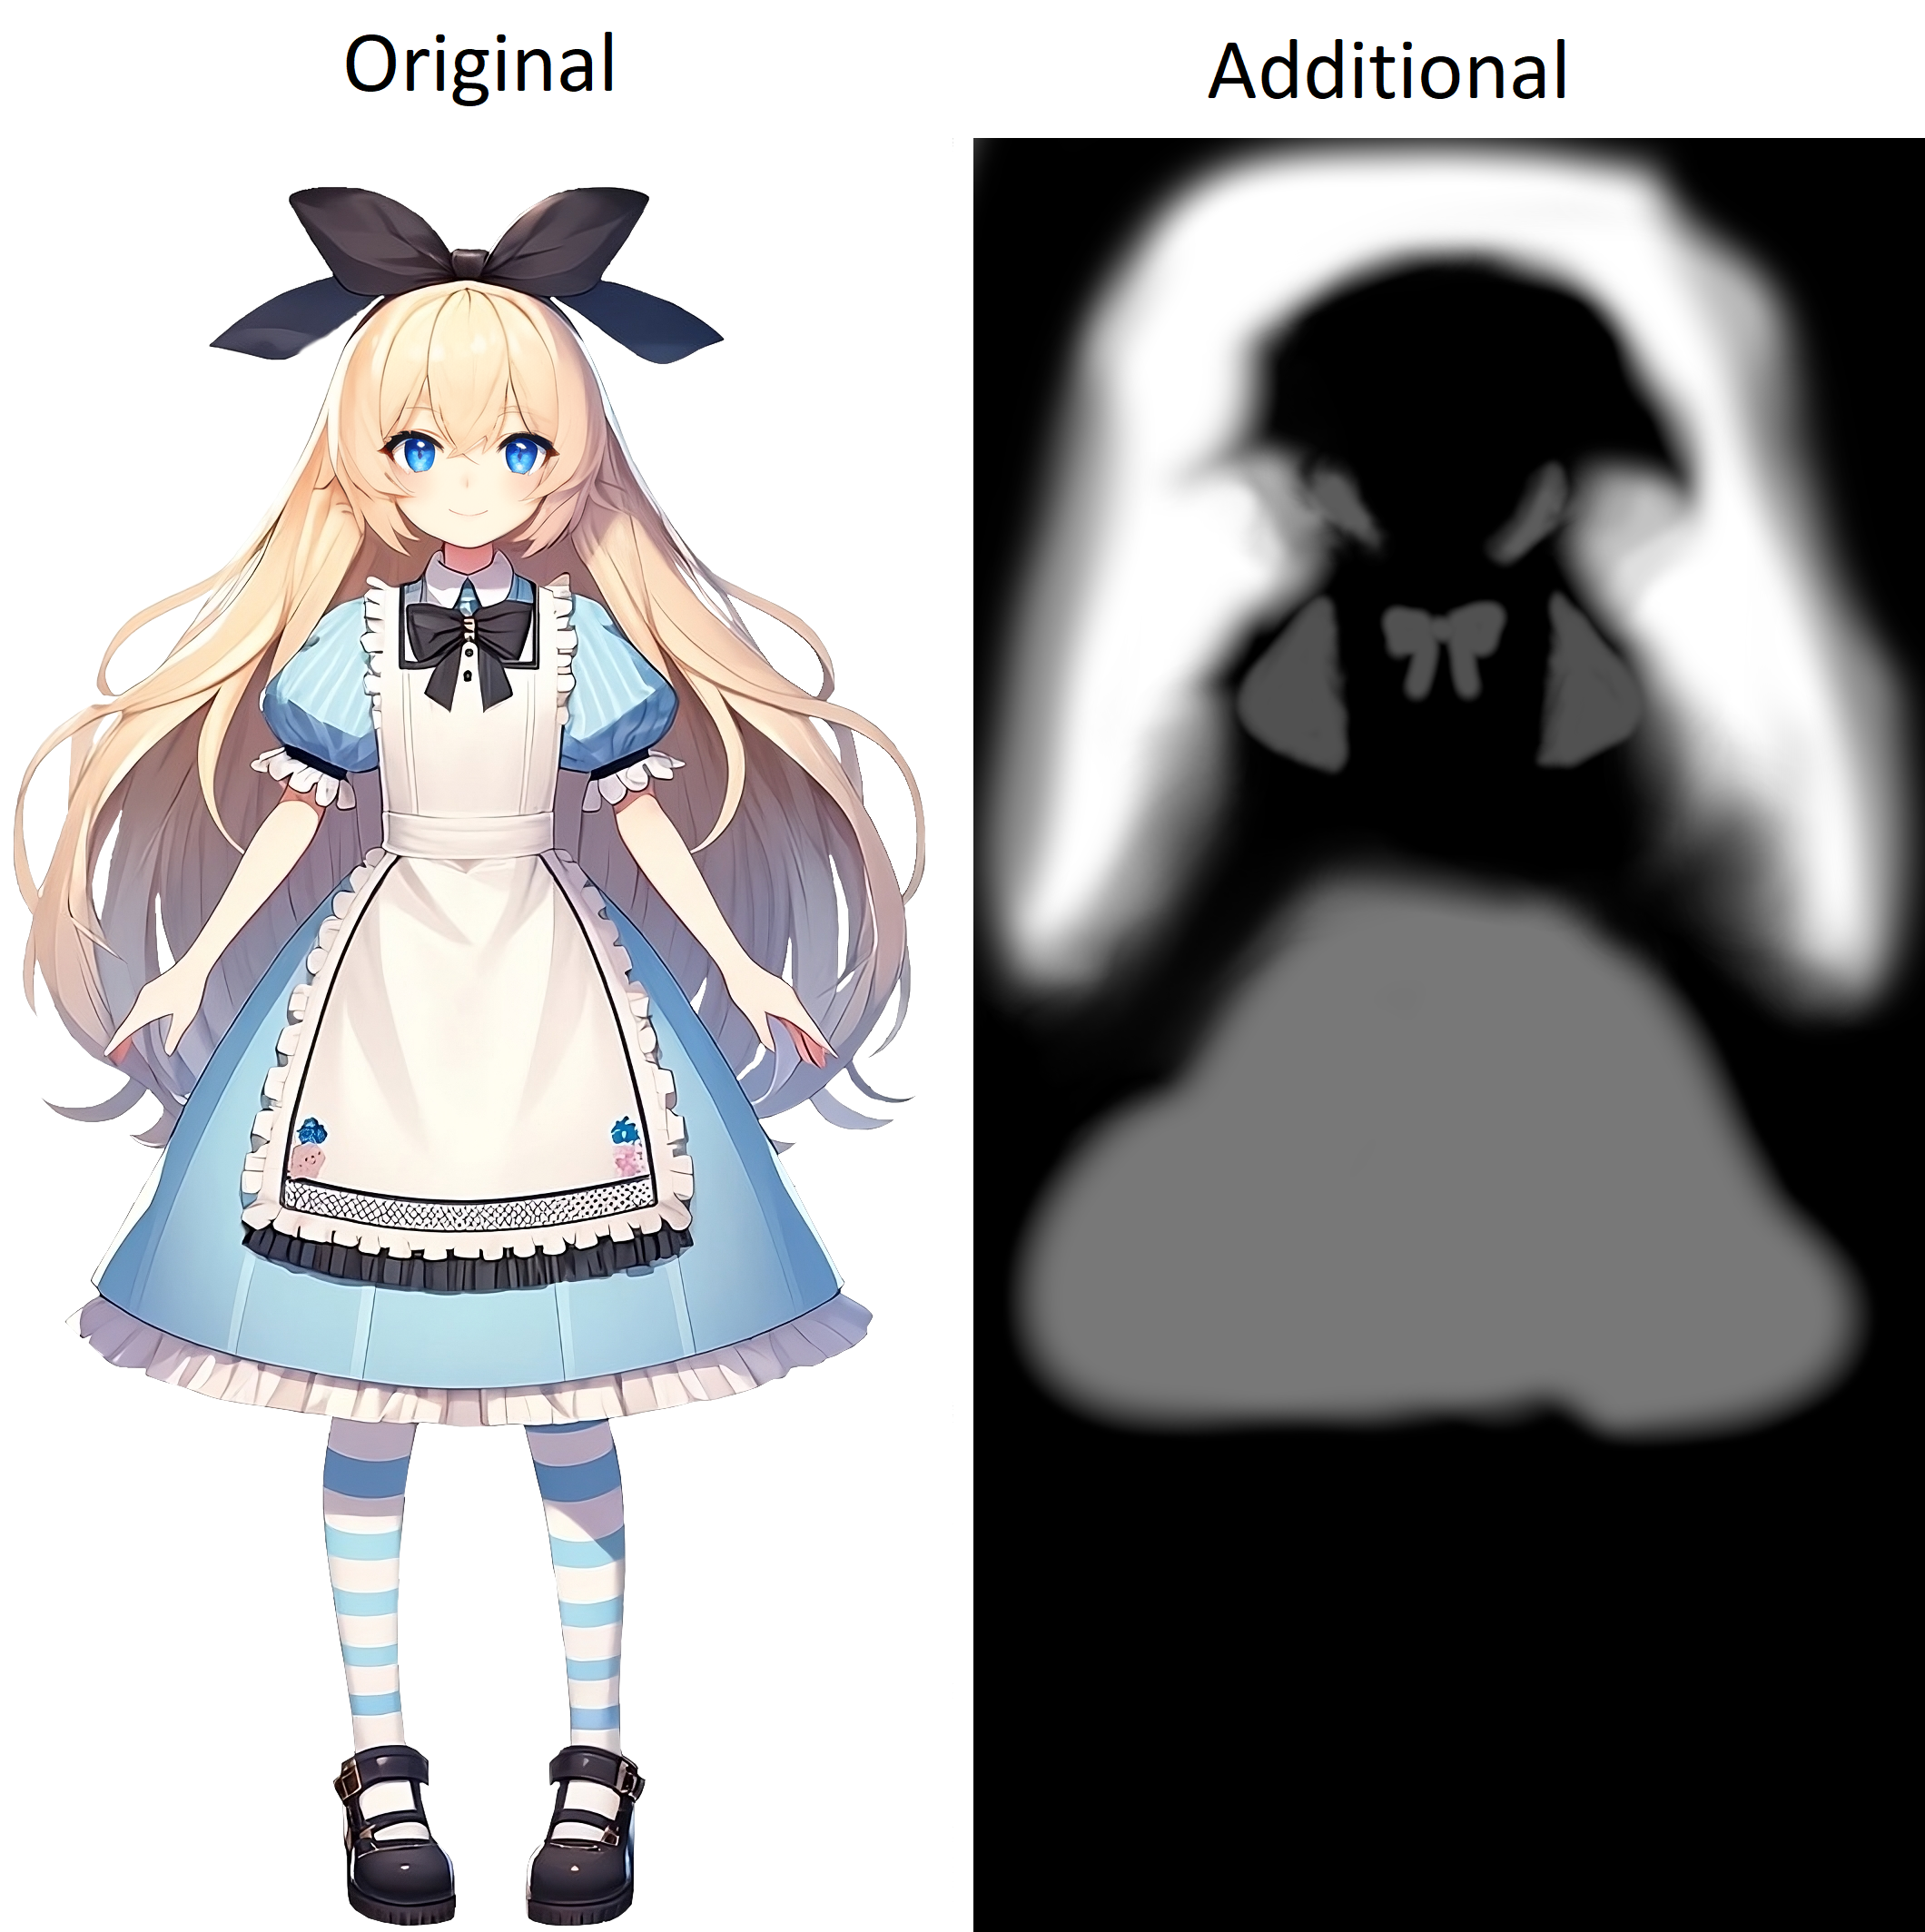
It is important to have a blurry image for the animations, otherwise the original image will look disconnected in the animations.
The shader for the animation looks like this:
renpy.register_shader("game.animation", variables="""
uniform sampler2D tex0;
uniform sampler2D tex1;
uniform float u_time;
uniform float u_breath_cycle;
uniform float u_offset; // in 0 1
varying vec2 v_tex_coord;
""", fragment_250="""
float a = texture2D(tex1, v_tex_coord, -0.5).x;
#define TEXC
vec2 texC = v_tex_coord.xy;
float xspread = -(texC.x - 0.5) * (1.0 + sin((u_offset + u_time / u_breath_cycle) * 2.0 * 3.141)) * a * 0.04;
texC.x += xspread;
texC.y += cos((u_offset + u_time / u_breath_cycle) * 2.0 * 3.141) * a * 0.006;
gl_FragColor = texture2D(tex0, texC, -0.5);
""")
As mentioned before, the texture gets an additional spread to the x-direction and y-direction. The variable a is taken from the secondary texture and controls the intensity of the spread.
Using this shader is more complicated because we need to create a model with two textures attached instead of one. First, you need to declare the model with the two textures like this:
image alice normal = Model().child("alice normal.png", fit=True).texture("alice_mask.png") # alice normal is the first texture, alice_mask is the animation mask.
The transform also looks more complicated:
transform breathing2(child):
child # this binds the model for the shader
anchor (0.5, 1.0)
shader ["renpy.texture", "game.animation", "game.breathing"] # This will use the default renpy vertex shader, followed by our animation shader and followed by the breathing shader
u_breath_cycle 5.0
u_offset 0.0 # TODO randomize
pause 0
repeat
Usage:
show alice normal at breathing2 # The child parameter is implicitly given by renpy and refers to the model declared above
It is also imporant that you use the breathing2 shader everytime you want to see the animation. Thus, you need to replace all
'show alice ...' with 'show alice .. at breathing2', otherwise the image might not get updated properly.
If you want to see the implementation in the visual novel, you can check out the github: https://github.com/kopaka1822/AliceWonderland/blob/master/game/script.rpy
The implementation in the github is more complicated because it automatically determines whether I apply the breathing shader, or both shaders.
The wind animation can be found in the game.wind shader and does similar tricks. It was originally inspired by another renpy project that demonstrates shaders. (Link is in the shader)
Important for Android:
The animations on android will stutter if you use the u_time variable because renpy uses a very low floating point precision by default for the fragment shader on mobiles. There are two workarounds:
Got to your renpy SDK and replace 'precision mediump float' with 'precision highp float' in the renpy/gl2/gl2shadercache.py
Or you need to replace u_time with a custom variable that does not get bigger than 60 seconds.
Comments
Log in with itch.io to leave a comment.
This is really useful, thank you!
Very nice shader. The explanation is very good. Looks awesome:)